Wednesday, October 31, 2012

31 Days of Decadent Desserts {Day 31} Pumpkin Gingerbread Trifle

We served this at my grandfather's 75th birthday party earlier this month. It's a pretty dish and very yummy. 


Pumpkin Gingerbread Trifle
original recipe can be found ~here~


Ingredient:
  • 1 gingerbread cake (I made a double batch of Laura Ingalls Wilder's famous gingerbread recipe but I could have just made 1 batch)
  • 1 package (4.6 ounces) cook-and-serve vanilla pudding mix
  • 3 cups milk
  • 1 can (29 ounces) pumpkin
  • 1/2 cup packed brown sugar
  • 2 cups whipped cream (I added about 2 teaspoons of pumpkin pie spice)


Directions:

  • Prepare and bake gingerbread according to recipe directions. Cool completely on wire racks. 
  • Meanwhile, for pudding, in a large saucepan, combine pudding mix and milk; stir until smooth. Cook and stir over medium heat until mixture comes to a boil. Cook and stir 1-2 minutes longer or until thickened. Remove from the heat; cool to room temperature. Combine pumpkin and brown sugar; stir into pudding.
  • In a 4-qt. glass serving bowl, crumble one gingerbread cake; gently press down. Top with half of pudding mixture and whipped cream. Repeat layers. Sprinkle some pumpkin pie spice on the top if desired.


:: :: :: :: :: :: ::

Here are the recipes shared from last Friday's link-up.

Marie from Marie Loves shared:


Kristen from Joyfully Thriving shared:


And Maureen from Red Cottage Chronicles shared:


:: :: :: :: :: :: ::


And so ends the 31 days project. It has been so much fun! Thank you for your wonderful comments, pins,  and links. A big thanks to the guest posters for helping me out this month!


What has been your favorite recipe this month?

Tuesday, October 30, 2012

31 Days of Decadent Desserts { Day 30} Lemon Cake

I've made this cake for birthday parties, soup suppers, and dinners. The lemon flavor is such a big hit and with the candied lemons, it gives the cake an extra special look. I've also added fresh thyme or rosemary as a garnish in addition to the candied lemons. 


Lemon Layer Cake

this recipe was originally found on the 


Ingredients:
1 cup (2 sticks) butter, room temperature
2 1/2 cups all-purpose flour
1/2 teaspoon baking powder
1/2 teaspoon baking soda
1 teaspoon salt
1 tablespoon lemon zest
2 cups sugar
3 large eggs
1/4 cup plus 2 tablespoons fresh lemon juice
1 cup buttermilk
1 lemon, thinly sliced and seeded


Directions:
1. Preheat oven to 350 degrees. Spray two 9 inch cake pans with cooking spray. 

2. In a medium bowl, whisk flour, baking powder, baking soda, salt, and lemon zest.
3. In a large bowl, using an electric mixer, beat butter and 1 1/2 cups sugar until light and fluffy. With mixer on low, beat in eggs and yolks, one at a time. Beat in 2 tablespoons lemon juice. Alternately beat in flour mixture and buttermilk beginning and ending with flour mixture; mix just until combined.
4. Divide batter between pans; smooth tops. Bake until cakes pull away from sides of pans, 32 to 35 minutes. Let cool in pans 10 minutes. Run a knife around edges of pans and invert cakes onto a wire rack.


Candied Lemon Slices
1. While cakes are baking, bring remaining 1/2 cup sugar and 1/2 cup water to a boil in a saucepan. Add lemon slices and simmer 25 minutes. 
2. Using a slotted spoon, transfer lemon slices to a waxed-paper-lined plate. Stir remaining 1/4 cup fresh lemon juice into syrup.
3. Using a toothpick, poke holes in warm cakes on rack. Brush with lemon syrup. Let cool completely. 


Lemon Icing
Ingredients: 
 1 stick butter, room temperature 
 1 box confectioner's sugar (3 3/4 cups) 
 2 tablespoons lemon juice
1 teaspoon milk

Directions:
1. Place butter in a large mixing bowl. Blend with an electric mixer on low speed until fluffy, 30 second.

2. Stop the machine and add confectioners' sugar, lemon juice, and milk. Blend with the mixer on low speed until the sugar is incorporated, 1 minute. Increase the speed to medium and beat until light and fluffy, 1 more minute. Add in up to 2 tablespoons of milk until icing is a  spreadable consistency. 

Frost cooled cakes and top with candied lemon slices.


Kati’s Little Corner of the World

Monday, October 29, 2012

31 Days of Decadent Desserts {Day 29} Maple Walnut Pie

Oh my! This recipe speaks Fall with its maple flavor. It looks something like a pecan pie but I don't think it's anywhere near sickeningly sweet. 


Maple Walnut Pie


this recipe was published in the book

Ingredients:

3 large eggs
1 cup pure maple syrup
1/4 cup brown sugar
2 tablespoons butter, melted
2 tablespoons all-purpose flour
1 teaspoon instant coffee granules
1/4 teaspoon salt
1 teaspoon vanilla extract
1/2 cup walnuts, coarsely chopped

Directions:
1. Preheat oven to 375 degrees. 
2. On a well-floured surface, roll out the dough until it is about 1/8-inch thick and will fit into a 9-inch pie plate. Gently pick up the dough, center it over the pie plate, and ease it into the plate. Trim the edges of the dough to leave a 1-inch overhang. Fold the edges under, and then decoratively crimp the perimeter. Put the pie shell in the refrigerator to chill until the filling is ready. 
3. In a medium bowl, beat the eggs until frothy. Add the maple syrup and brown sugar, and whisk until well combined. Add the melted butter, flour, coffee granules, salt, and vanilla, and continue in whisk until all the ingredients are blended. Fold in the walnuts. 
4. Remove the pie shell from the refrigerator, and pour the filling into the shell. Bake the pie 40-45 minutes, or until the filling is set. The filling may puff substantially as it bakes, but it will fall as it cools. Let the pie cool to room temperature before enjoying. 


I don't think a really good pie can be made without a dozen or so children peeking over your shoulder as you stoop to look in at it every little while. 
 ~John Gould


Kati’s Little Corner of the World

Sunday, October 28, 2012

31 Days of Decadent Desserts {Day 28} Sponge Cakes

When my dear friends Mr. Steve and Miss Tamera gave me a dessert shell pan, I went on a search for something to make in them. I came across a recipe for Julia Child's sponge cake in her cookbook Mastering the Art of French Cooking. Then I tried to find something to put in the small cavities and found a recipe for chocolate whipped cream. 


Sponge Cakes 
with Chocolate Whipped Cream


  Butter Sponge Cakes
   or Biscuit au Beurre
   as found in Julia Child's cookbook 

  • 4 tablespoons butter
  • 2/3 cup granulated sugar
  • 4 egg yolks
  • 2 teaspoons vanilla extract
  • 4 egg whites
  • pinch of salt
  • 2 tablespoons granulated sugar
  • 3/4 cup flour


  1. Preheat oven to 350 degrees. Spray pan with cooking spray. 
  2. Melt the butter and set aside to cool.
  3. Gradually beat the sugar into the egg yolks, add the vanilla, and continue beating for several minutes until mixture is thick, plate yellow, and forms the ribbon.***see note 
  4. Beat the egg whites and salt together in a separate bowl until soft peaks are formed; sprinkle on the sugar and beat until stiff peaks are formed. 
  5. Scoop one fourth of the egg whites over the top of the egg yolks and sugar mixture. Sift on one fourth of the flour, and delicately fold in until partially blended. Then add one third of the remaining egg whites, sift one one third of the remaining flour, fold until partially blended, and repeat with half of each, then the last of each and half of the tepid, melted butter. When partially blended, fold in the rest of the butter but omit the milky residue at the bottom of the pan. Do not overmix; the egg whites must retain as much volume as possible.
  6. Turn into prepared cake pan, tilting pan to run batter to the rim all around. Set in middle level of preheated oven and bake for 30-35 minutes. Cake is done when it has puffed, is lightly brown, and has just begun to show a faint line of shrinkage from the edge of the pan.
  7. Remove from oven and let stand in the pan for 6-8 minutes. It will sink slightly and shrink more from the edges of the pan. Run a knife around the edge of the pan, and reverse on cake rack, giving the pan a sharp little jerk to dislodge the cake. If the cake is not to be iced, immediately reverse it so its puffed side is uppermost. Allow to cool for an hour or so. 

***Forming the ribbon prepares the egg yolks so that they can be heated without turning granular. The mixture will turn a pale, creamy yellow, and thicken enough so that when a bit is lifted in the beater, it will fall back into the bowl forming a slowly dissolving ribbon on the surface of the mixture. Do not beat beyond this point or the egg yolks may become granular. 


  Chocolate Whipped Cream
  • 4 ounces bittersweet chocolate, chopped
  • 1 cup whipping cream
  • 2 tablespoons sugar


  1. Put chopped chocolate into a medium bowl.
  2. Pour cream into a small heavy saucepan; stir in sugar. Place over medium heat and bring to a boil. 
  3. Pour boiling cream over chocolate; stir until smooth and chocolate is melted. Cover and refrigerate for 4 hours, until thoroughly chilled.
  4. Transfer to a large bowl. Beat to spreading or filling consistency, or until it reaches soft peaks. Refrigerate for about 1 hour before using.


Kati’s Little Corner of the World

Saturday, October 27, 2012

31 Days of Decadent Desserts {Day 27} Mint Cookies

I am a mint lover so I was excited to try these cookies. They were good but a bit too minty for me though my nephew who is very picky liked them. Next time I might try to reduce the mint a little.


Find the recipe for these mint cookies ~here~.


Kati’s Little Corner of the World

Friday, October 26, 2012

31 Days of Decadent Dessert {Day 26} Crème Brûlée and Link-up

When the Cuisine at Home sample issue came in the mail I scanned through it to see what yummy things it had and I found this recipe. I've always liked the look (and name) of Crème Brûlée and I decided to give it a try. 


Vanilla Crème Brûlée
Source: Cuisine at Home magazine, sample issue
makes six 4-oz. brûlées

For the crème brûlée:

2 tablespoons sugar
1 cup heavy cream
1 cup half-and-half
3 egg yolks
1 egg
2 tablespoon vanilla extract
1/4 cup sugar
pinch of salt

For the topping:

1/2 cup packed brown sugar
1/4 granulated sugar

Directions:

1. Preheat oven to 350.
2. Pulverize the 2 tablespoons sugar in a coffee grinder.
3. Warm cream, half-and-half, and sugar in a saucepan over medium heat just until steam rises.
4. Whisk egg yolks, egg, vanilla, 1/4 cup sugar, and salt together in a mixing bowl. Slowly whisk hot cream mixture into eggs to temper.
5. Laddle mixture evenly between the six ramekins. Arrange  dishes in a baking pan. Add hot water to the pan. Carefully transfer pan to the oven. Bake 35-45 minutes or until set but still jiggly. Do not overcook.
6. While brûlées are in the oven, combine brown sugar and granulated sugar, then spread the mixture on a parchment-lined baking sheet.
7. Remove ramekins from water bath, cool, then cover loosely with plastic wrap. Chill until completely cold, preferably overnight. After the brûlées are out of the oven, turn the oven off and place the sugar pan inside the oven for an hour to dry out the sugars.
8. Transfer the sugar to a food processor and pulverize until fine. Store in an airtight container until ready to caramelize.
9. After the brûlées are cool, blot tips of custards dry with a paper towel. Sprinkle sugar mixture over each custard. Using a kitchen torch, met the sugar by waving the flame 4-8 inches from the surface until caramelized.


Want a sample issue of Cuisine at Home? Click ~here~ to find out how to get your copy.
 
:: :: :: :: ::


Now on to the link-up.

Last week's link-ups:

Maureen from Red Cottage Chronicles shared:


Mom (Cheryl), who blogs at Thinking About Home shared:


Link-up week 4:


Kati’s Little Corner of the World

Thursday, October 25, 2012

In Which We Reach Into the Cup and Choose A Winner


The winner of the Fall Baker's Party Pack is...


Congratulations!

31 Days of Decadent Desserts {Day 25} Jewish Apple Cake | Guest Post by Lorraine

Meet our last guest poster of the month, Lorraine, who blogs at With a Grateful Prayer and a Thankful Heart. (Lorraine's blog is where I found the recipe for the strawberry pie I posted on Day 3.)


This recipe is, as my mom would say, as old as the hills. I got it from my mom and she probably got it from her mom. And you probably have a
Jewish Apple Cake recipe in your file box.


It's a moist, dense yet tender cake full of apple goodness.


Here is my handed-down recipe:

Jewish Apple Cake 
5 or 6 Apples, pared, cored & sliced
2 teaspoons Cinnamon
5 tablespoons Sugar
3 cups Flour
2 cups Sugar
1 cup salad Oil
4 Eggs
¼ cup Orange Juice
3 teaspoons Baking Powder
2½ teaspoons Vanilla
1 teaspoon salt

Sprinkle apples w/ 2 tsp. cinnamon mixed w/ sugar. Combine all other ingredients and beat to make smooth batter. Pour half into greased and sugared angel cake pan. Arrange half of the apples over batter and cover with remaining batter. Top with the rest of the apples. Bake 1 1/2 hours at 350 degrees. Turn out and stand to cool on rack.

Note:  To make mini-loaf cakes, I used 6 5 x 3-inch pans and baked 1 hour 5 minutes to 1 hour 10 minutes.


Lorraine


Lorrie profile picI am a wife of thirty-seven years to my kind and loving husband, John. We have four daughters and ten grandchildren that we thoroughly enjoy. My saving faith in Jesus as my Savior is central in my life and I am ever thankful to Him. I enjoy many and varied activities including hospitality, cooking, baking, genealogy and flowers (indoor & outdoor... well anywhere for that matter) I like knitting, crocheting, Scherenschnitte, cutting and folding paper projects and photography. I love mornings, quiet evenings, tea parties with my granddaughters, snowflakes, the color white, fireworks, and baby feet. Oh, I love dogs too.


~ ~ ~

Thank you so much, Lorraine, for doing this guest post!


Wednesday, October 24, 2012

31 Days of Decadent Desserts {Day 24} Chocolate Fudge

Warning: This is very addictive! Think about making this when you have other to help you eat it.

Simple Chocolate Fudge

this recipe was originally found on the 

Ingredients:

4 tablespoons (1/2 stick) unsalted butter, plus more for pan
3 cups mini marshmallows
1 cup sugar
1/2 cup heavy cream
1/2 teaspoon salt
1/2 teaspoon pure vanilla extract
1 bag (12 ounces) semisweet chocolate chips
1 cup walnuts, coarsely chopped (optional)

Directions:
1. Butter an 8-inch square baking pan; line with 2 crisscrossed pieces of parchment paper, leaving an overhang. Butter paper.
2. In a large saucepan, combine butter, marshmallows, sugar, cream, and salt; cook over medium, stirring occasionally, until marshmallows are melted, 8 to 10 minutes. Off heat, stir in vanilla, chocolate chips, and 1/2 cup walnuts until chocolate is melted.
3. Pour fudge into prepared pan, and smooth top; sprinkle with remaining walnuts. Let cool 30 minutes. Refrigerate until set, about 1 hour.
4. Using overhang, lift fudge onto a cutting board; cut into squares (6 rows by 6 rows).


Research tells us fourteen out of any ten individuals likes chocolate. 
 ~Sandra Boynton 


Last day to enter The Fall Baker's Party Pack giveaway!


Kati’s Little Corner of the World

Tuesday, October 23, 2012

31 Days of Decadent Desserts {Day 23} Boards of Pinspiration

Last week, I shared with you some of the dessert pins I've found. Today, I'm going to show you a few dessert boards I've found for ideas.

Everyday Food magazine has a pinterest account. They have two different dessert boards, Time for Dessert! and Frozen Desserts.

Martha Stewart also has a board called Everyday Food that has desserts sprinkled in among the chicken dishes, soups, and veggies.

Then there are the boards Great American Cakes and Bake It Better by America's Test Kitchen that have fabulous looking recipes to peruse.

The blogger Bakerella (blog here) has many fabulous sweets boards including Holiday Sweets & Eats, Sweet Stuff, and Pretty Cakes. Bakerella also has a board called Bakerella Cake Pops which showcases some of the cake pops from her books. (They can be found ~here~ and ~here~.)

Vickie and Jo Ann from Gooseberry Patch have 10 boards that offer sweet ideas including Cakes and Cakes, Christmas Sweet Shoppe, Sweets & Treats, and Just Desserts. They even have a board dedicated wholly to Nutella! There is something for everyone.

If you have a certain chef that you like (such as Paula Deen, Emeril, etc.) then do a search for that person's name under the "People" search.


Linking up to The Vintage Apple's Oh How Pinteresting Wednesday...


And don't forget to enter ~this~ giveaway if you haven't already.

Kati’s Little Corner of the World

Monday, October 22, 2012

31 Days of Decadent Desserts {Day 22} Cranberry Upside-Down Cake

Beautiful + yummy + Fall-ish in flavor = perfect dessert :)


Cranberry Upside-down Cake
originally blogged ~here~ adapted from ~this~ recipe 


Ingredients: 
1 cup sugar, divided
½ teaspoon cinnamon
¼ teaspoon allspice
2 cups fresh or frozen cranberries
½ cup butter
1 egg
1 teaspoon vanilla
¼ cups flour
1 ½ teaspoons baking powder
¼ teaspoon salt
1 cup milk

Directions:
  1. Grease 9-inch cake pan.  Preheat oven to 350°.
  2. Whisk together ½ cup of the sugar, cinnamon, and allspice. Sprinkle in pan. Evenly distribute cranberries over sugar mixture. Set aside.
  3. In an electric mixer, cream butter and remaining sugar until light and fluffy. Beat in egg and vanilla.
  4. In another bowl, whisk together flour, baking powder, and salt. Blend into creamed mixture. On low speed, beat in milk.
  5. Spoon batter into pan over berries. 
  6. Bake 35 minutes or until a toothpick inserted into center comes out clean. 
  7. Let cool completely before turning out of baking pan onto serving platter. 


Still time to enter the giveaway ~here~ for the Fall Baker's Party Pack.

Kati’s Little Corner of the World

Sunday, October 21, 2012

31 Days of Decadent Desserts {Day 21} Apple Pie

Fall is a time for eating pies while wearing sweaters. Apple pie, with the cinnamon-y flavor and a dollop of whipped cream, is one of my favorites. 


Apple Pie
*** this recipe can be found in the back of the children's book
How To Make An Apple Pie and See the World by Marjorie Priceman


Crust
 ~ 2 cups flour
 ~ 1 teaspoon salt
 ~ 1 cup butter
 ~ 1/2 cup ice water
 ~ 1 egg yolk

Sift flour and salt together in a bowl. Quickly rub small pieces of cold butter into the flour mixture with your fingers until bits are the size of peas. Add ice water, starting with a few tablespoons and adding more as needed to moisten all the dough. Stir with a fork until mixture forms a loose ball. Divide dough in half and make two equal patties. Place one patty between two pieces of wax paper. With a rolling pin, toll into a 12-inch circle. Peel off the top piece of wax paper and turn into pie pan. Remove wax paper. Trim around the edge. Roll out the tip crust in the same way. Refrigerate both until ready to use. 

Filling
 ~ 5-7 apples
 ~ 3/4 cup sugar
 ~ 1 teaspoon cinnamon
 ~ 1/4 teaspoon salt
 ~ 2 tablespoons butter 

Preheat oven to 435. In a large bowl, mix together sugar, cinnamon, and salt. Peel, core, and cut apples into 1/2-inch slices. Toss the apples into the sugar mixture, coating them well. Arrange apple slices in the pie pan, piling them higher in the center. Dot with butter. Moisten the edge of the bottom crust with water. Cover the pie with the top crust, trim the edge, then pinch top and bottom edges together. Cut some vents in the top crust. To glaze the crust, mix an egg yolk with 1 tablespoon of water. Brush the mixture over the surface of the top crust. Bake 45 minutes or until apples are tender and crust is golden brown. Remove pie and allow to cool before serving.


“Good apple pies are a considerable part of our domestic happiness.” 
~Jane Austen


Kati’s Little Corner of the World

Saturday, October 20, 2012

31 Days of Decadent Desserts {Day 20} Peanut Butter Cup Cookies

Oh boy! Even those who don't care for peanut butter that much loved these.


Peanut Butter Cup Cookies
the original recipe can be found ~here~


Ingredients:
~ 1 cup all-purpose flour (spooned and leveled)
~ 1/2 teaspoon baking powder
~ 1/4 teaspoon fine salt
~ 1/2 cup natural peanut butter
~ 6 tablespoons (3/4 stick) unsalted butter, room temperature
~ 1/2 cup packed light-brown sugar
~ 1 large egg, plus 1 large egg yolk
~ 1/4 cup buttermilk
~ 1/4 teaspoon pure vanilla extract
~ 48 miniature chocolate peanut-butter cups, such as Reese's

Directions:
1. Preheat oven to 350 degrees, with racks in upper and lower thirds. Line two 24-cup mini muffin pans with paper liners. In a medium bowl, whisk together flour, baking powder, and salt. In a large bowl, using an electric mixer, beat together peanut butter, butter, and brown sugar on high until pale and fluffy, about 3 minutes. Beat in egg and egg yolk, scraping down bowl as needed. With mixer on low, beat in flour mixture, buttermilk, and vanilla until combined.

2. With the large end of a melon baller or a spoon, place 2 teaspoons batter into each muffin cup, then press a peanut-butter candy into each center until batter aligns with top edge of candy. Bake until puffed and set, about 10 minutes, rotating pans halfway through. Let cool completely in pans on wire racks.


A balanced diet is a cookie in each hand. 
 ~Author Unknown


Kati’s Little Corner of the World

Giveaway # 2 Winner

The winner of the cupcake earrings is...


Katherine!


Congratulations Katherine! I'll be contacting you shortly.

Friday, October 19, 2012

31 Days of Decadent Desserts {Day 19} Chocolate Chip Bars and Link-up

This is my go to recipe when I need something quick. These are so easy to make and so buttery good. 


Chocolate Chip Bars

Ingredients:

1 cup butter, softened
1 cup brown sugar, packed
1 teaspoon vanilla extract
2 cups flour
1/8 teaspoon salt
6-oz. bag chocolate chips 

Directions:

1. Preheat oven to 350 degrees. Beat together butter, sugar, and vanilla until smooth.
2. Add flour and salt and mix until combined. Stir in chocolate chips.
3. Press into a 9x13-inch baking pan and bake for 20-25 minutes.


Don't wreck a sublime chocolate experience by feeling guilty. 

 ~Lora Brody


:: :: :: :: ::

Link-up week 3:


Last day for ~this~ giveaway and still time to enter ~this~ giveaway.


Kati’s Little Corner of the World

Thursday, October 18, 2012

31 Days of Decadent Desserts {Day 18} Giveaway #3 - Fall Baker's Party Pack

THIS GIVEAWAY IS NOW CLOSED


October's Party
~George Cooper

October gave a party; 
The leaves by hundreds came - 
The Chestnuts, Oaks, and Maples, 
And leaves of every name. 
The Sunshine spread a carpet, 
And everything was grand, 
Miss Weather led the dancing, 
Professor Wind the band. 


The third and final giveaway of the month, is something that I've put together for one lucky winner.

Now that we are in the midst of autumn, the weather has turned crisp and those sweaters that were in hiding during the summer months have finally made their way back out. Fall is a perfect time for patio parties, hay rides, and bonfires. And any party wouldn't be complete without desserts.

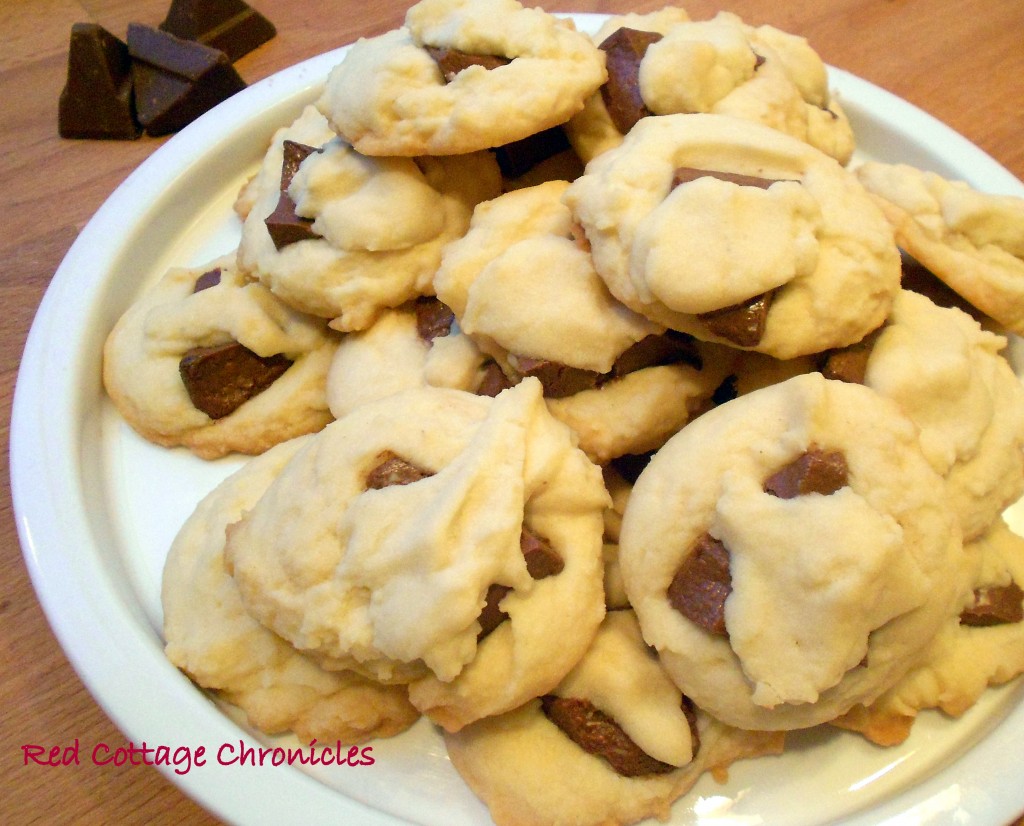
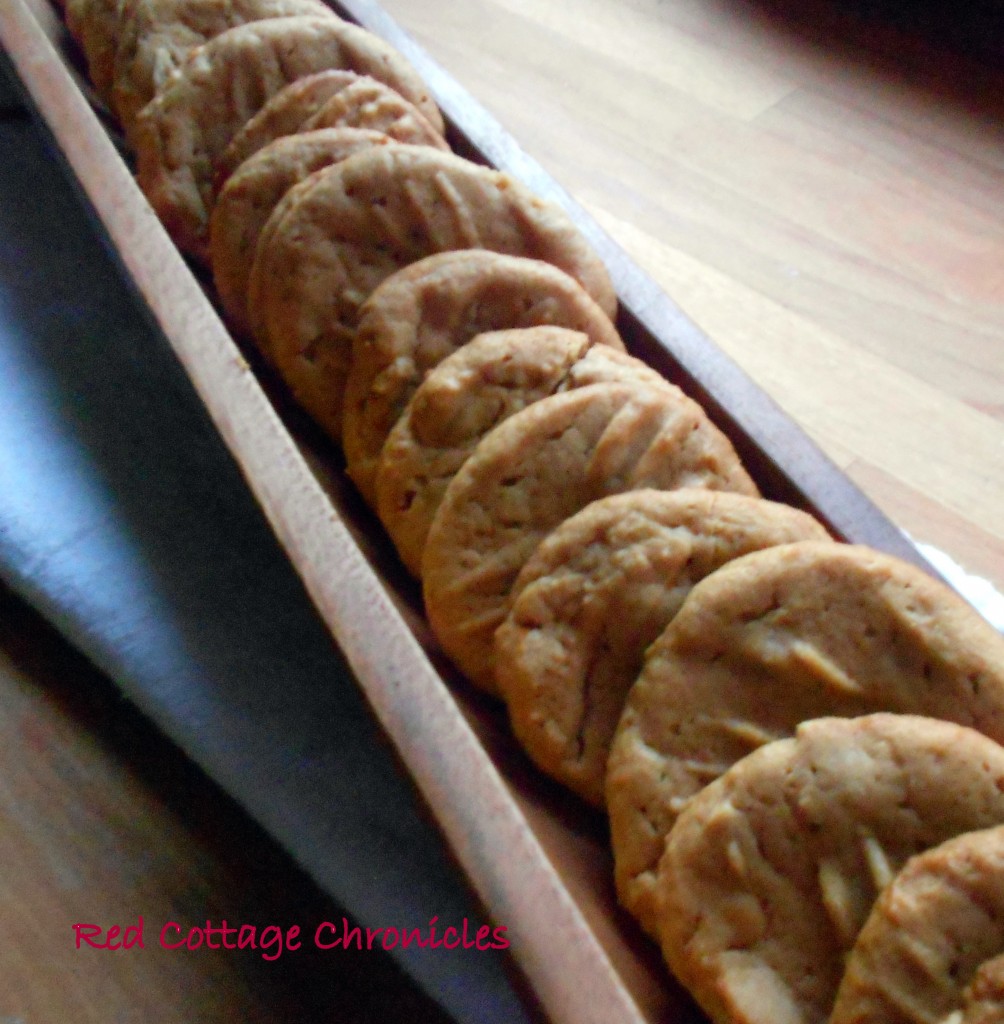
When you are thinking about Fall desserts what do you think of? Apple pie? Pumpkin cake? Gingerbread cookies?

Even desserts that aren't particularly "Fall" can take on the hue with a few easy changes.

Plain cupcakes can be enhanced by using autumnal cupcake liners and flags or colored icing. 

Spice up an ordinary cake with a cake banner.

And those cookies could go from simple to stellar by using fall cookie cutters and sprinkles.

My hospitality tip: Even the simplest of spruce-ups can make your guests feel special.


Now we come to the giveaway part. To start you off with your own collection of Autumn dessert enhancements I am giving away:


Turkey cupcake papers (25 pack)


Twenty-four autumnal cupcake flags


Autumnal cake banner (fits on any size cake)


Oak leaf cookie cutter


Four pack of assorted fall sprinkles


This giveaway is open to readers in the US only. Sorry international readers! The giveaway will stay open through next Wednesday. If you leave a comment on this post you are automatically entered into the giveaway.


Linking up to Mom's party:


Wednesday, October 17, 2012

31 Days of Decadent Desserts {Day 17} Rainy Day Chocolate Pudding | Guest Post by Kristin

Today's guest poster is none other than my older sister Kristin...


I don't know about you, but chilly rainy days make me want to eat...and since I am the primary food-preparer in our house, rainy days often find me stirring up something yummy on the stove.  While a hearty beef stew or a spicy taco soup would suit my palate, a rich chocolate dessert will please everyone, including the children!


Stir the first three ingredients together in a large pot.  Cook on medium heat, stirring often, until chocolate melts.


Mix next two ingredients in small bowl, whisking until mixture is smooth with no lumps.  When you think it is smooth, whisk some more, making sure that all lumps are gone!  Pour into mixture on the stove.  Stir constantly until it comes to a boil.  Turn down the heat and continue cooking until mixture returns  to a light boil and begins to thicken. 


Turn off heat and stir in vanilla. 

Pour into a large bowl and refrigerate for 1-2 hours until chilled and ready to serve. 


Kristin is a  married   mother of five children under the age of 10.  She is also blogging for 31 Days Bits and Pieces From My Life.


:: :: :: :: :: :: :: :: :: :: :: :: :: :: :: :: ::


Thank you for guest posting today, Kristin!

And the giveaway is still going on.