Friday, October 31, 2014

It's a Wrap! Day 31

Wrapping Paper Band

This is a great wrapping idea for men, women, or children.

1. Wrap the gift in plain colored paper.
2. Cut a band out of another wrapping paper. This one can be another plain color, a printed design, etc.
3. Attach both ends of the band at the back of the gift with Scotch tape.
4. Finish off with a ribbon.


For this gift I used a brown paper on a hunter green paper and tied with jute.


This one my sister Bekah created. She used a bright pink polka dot paper and made her band with a bright pink and red chevron paper. Instead of using ribbon or string, she chose use a strip of washi tape. This also holds the band in place without using Scotch tape.


This post finishes up the It's a Wrap! series. Come back on Monday for a conclusion and a list of all the ideas in one convenient place. 


~ ~ ~


Thursday, October 30, 2014

It's a Wrap! Day 30

Wrapped Bread

Yesterday I shared a wrapping idea for bread. Here is another idea to wrap up a loaf of bread using parchment paper, bakers twine, and washi tape.


1. Wrap your bread in parchment paper and tape edges down if needed. (I first wrapped the loaf in plastic wrap so that it wouldn't dry out quite as fast.)
2. Cut a long piece of washi tape. It will need to go all the way around and overlap several inches.
3. Finish off by tying bakers twine around the loaf. 


~ ~ ~


Wednesday, October 29, 2014

It's a Wrap! Day 29

Bread Label

This idea is perfect for a hostess gift, to include in gift set, or as a thinking of you gift. Make a favorite loaf of bread (I made some rosemary bread) and you have a wonderful, thoughtful, yummy gift. To finish off your gift, add a label telling the type of bread you made.

Wrap your loaf of bread in plastic wrap. Print the bread label (which you can find below the picture) and cut out. Write the name of the bread on the label. Wrap around the bread and tape ends down. 


Bonus:
Free printable label. Download, print, and use for your own gift loaf.


~ ~ ~


Tuesday, October 28, 2014

It's a Wrap! Day 28

Gift Card Envelope

This idea is perfect for spicing up the plain gift card. Instead of using the envelope that usually comes with a gift card, make it look more personal and cute with an handmade one using scrapbook paper. Tie a bow around the envelope, stick it in a card, or stick it in a small box and wrap it up that way. 

I found the inspiration and pattern ~here~. 


~ ~ ~


Monday, October 27, 2014

It's a Wrap! Day 27

Pineapple Wrapping Paper

It's hard to believe this is the last week of October! Today marks the start of paper week.

This pineapple paper I found via Pinterest. It's available as a free download ~here~. I printed out a couple of sheets on regular computer paper and taped them together to cover the whole gift. I finished this package off with orange bakers twine. 


~ ~ ~


Sunday, October 26, 2014

It's a Wrap! Day 26

Happy Sunday!


~ ~ ~


Saturday, October 25, 2014

It's a Wrap! Day 25

Printed Ribbon

For this wrapping idea, I dug into my stash of ribbons. I found this "Adorable" printed ribbon to wrap around this gift. I used a handmade burp cloth as the "wrapping paper". This is a great idea for a baby shower gift. Every part of the gift can be used for the little one.

You can find all kinds of printed ribbon on Amazon and at most craft stores...Christmas, kids, elegant, cutesy, words, I've even seen camo! If you can't find any printed ribbon that works for your package, you can always use a plain colored grosgrain ribbon.


~ ~ ~


Friday, October 24, 2014

It's a Wrap! Day 24

Colorful Ribbons

This idea is really simple and easy. Instead of using just one color of curly ribbon on a gift, use two or three colors. It adds more pizazz to the gift without taking a lot of time and energy. 


~ ~ ~


Thursday, October 23, 2014

It's a Wrap! Day 23

Bakers Twine Wrap

For this one you need a long length of bakers twine. Wrap the twine around and twist the ends a half turn at the back of the gift. Then wrap the twine around the other way. Keep wrapping the twine, twisting half turns, until you reach the end of the twine. Finish off by tying into a knot or making a bow. 


~ ~ ~


Wednesday, October 22, 2014

It's a Wrap! Day 22

Brown Paper Package Tied Up with String

I took inspiration from the Sound of Music for this one. First I made a label using PicMonkey. I printed it and cut it out. I cut out a slightly larger square out of scrapbook paper and glued together with dots of glue in each corner. Or you could also use photo splits

Wrap your gift in brown paper or use a brown paper gift bag. Tie jute or some other kind of string around the package. Attach the label using glue stick or photo splits.


Bonus:
Free printable label. Feel free to save this to your computer, print, and use on your own gift.


~ ~ ~


Tuesday, October 21, 2014

It's a Wrap! Day 21

Bakers Twine and Doily Package

This one has a delicate look to it. It's a great wrapping idea for a wedding gift or shower gift.

You just need a paper doily and bakers twine. Place the doily on top of the gift and tie the ribbon on. 


~ ~ ~


Monday, October 20, 2014

It's a Wrap! Day 20

Yarn-Wrapped Gift

Today's post is the start of strings and ribbons week. I'll be sharing ideas using yarn, bakers twine, jute, and ribbon.

This is a great idea using up those pieces of yarn that aren't enough to make a project with but long enough that you don't want to throw it away. It's easy peasy, too!

Take a long piece of yarn and wrap around the gift as many times as the yarn allows. To finish off either tie the ends into a bow in the front or tape the ends down in the back.

On this gift I added a strawberry ornament to embellish the package. 


~ ~ ~


Sunday, October 19, 2014

It's a Wrap! Day 19

Happy Sunday!


~ ~ ~


Saturday, October 18, 2014

It's a Wrap! Day 18

Scotty Dog Silhouette

This is another one of my sister Bekah's ideas. She created this one but gave me permission to post it as part of my series.

You will need:
gift wrapped in plain paper
scotty dog silhouette image
decorative paper
glue stick
ribbon or yarn

1. Trace a scotty dog sihouette onto decorative paper. Bekah found a free clip art image to use by doing a google search. Cut out the dog.
2. Glue the scotty dog onto the package.
3. Cut a piece of ribbon or yarn and tie into a bow. With glue, adhere onto the scotty's neck.


~ ~ ~


Friday, October 17, 2014

It's a Wrap! Day 17

Minion

My nephews really like the movie Despicable Me and they love anything minion. So for my nephew Owen's birthday, I decided to wrap his gift in a minion.

I used yellow cardstock to wrap the gift. Any bright yellow paper will do. Cut a large circle out of grey paper, cut a smaller circle out of white paper, and an even smaller circle out of brown paper. These circles will be the eye and the goggles. Glue all the circles together, then glue to the package leaving a few inches at the top. With a black sharpie, draw a dot in the middle of the brown circle. Then draw a smile, several lines near the top for hair, and a band across the side of the gift coming off from the circles for the goggles band. 


Bonus picture: Owen with his minion gift. :)


~ ~ ~

Thursday, October 16, 2014

It's a Wrap! Day 16

Owl Ornament

Any child would love to get a glimpse of their birthday package and see a sweet felt stuffed animal looking up at them.

Since I had a whole bunch of owls already made, I decided to go for an owl on top of the package.

I found the pattern for the owl in the book Craft-a-Day by Sarah Goldschadt. In this book, you can also find patterns for other animals such as bears, foxes, fish, birds, ladybugs, cats, dogs, etc. And it's not just animals featured. You can find patterns for hearts, rain clouds, umbrellas, robots, hexies, and snowmen. It's a really great book and I highly recommend it!

Anyway, back to the wrapping idea...

I sewed a string near the top of the owl (I would suggest using embroidery thread since it's a bit sturdier) and knot the ends together. On your package, start to tie your ribbon on but stop once you've made your first knot. Thread the owl string through one of the ribbon ends and pull through until you reach the knot on the package. Finish tying the ribbon by either making another knot or making a bow. 


~ ~ ~


Wednesday, October 15, 2014

It's a Wrap! Day 15

Tote Bag Gift Bag

This one is both a wrapping idea and a gift idea. Instead of using wrapping paper or paper gift bag, use a tote bag. A little kid would love to receive a character tote bag (like the Hello Kitty one below). Or use a plain tote bag (you can find these at Hobby Lobby and other craft stores) made festive with embellishments or embroidery. Once it's done being a gift bag it can become a tote bag to carry books, craft supplies, stuffed animals, etc. 


~ ~ ~


Tuesday, October 14, 2014

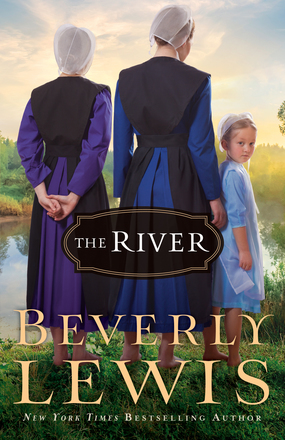
The River {Book Review}

*** I was given a copy of this book by Bethany House Publishers in exchange for my honest review of the book. 

I "like" Beverly Lewis on Facebook which means I can see when her new books come out, and I've read almost all of them. Her latest three books I've been fortunate to get through Bethany House Pulishers

Cover Art
source
The River is about Tilly and Ruth. The two formerly Amish sisters who left the community after the death of their little sister. After years of being away, they return to their family for their parent's anniversary party. Once they get home, they are confronted with the troubles of their past. 

Although this wasn't one of my favorites of Beverly Lewis's books, it was still a great story and I thoroughly enjoyed reading it. (There are books of hers I like better, such as all the books in her Abram's Daughters series.) There was a little bit of mystery in the story involving Tilly and her father's relationship which makes for an interesting read. There was some sadness regarding little Anna who died in a drowning accident, but there was also joy in reading about the rekindling of friendships and healed relationships. 


If you like Amish fiction I would recommend you read this book. I think you would enjoy it!

:: :: :: :: ::

If you're looking for today's It's a Wrap! post, click ~here~. 

It's a Wrap! Day 14

Washi Lego

This one could be considered part of washi week but since young boys would be on the receiving end of this package, I'm putting it in kids week.

This wrapping idea was actually my sister Bekah's idea. She knew that her nephew Owen loves legos and thought that he would love to open a gift with a lego on it. 

Cut one long piece of washi tape and two short pieces. On your wrapped gift, attach the two short pieces with some space in between then attach the long piece overlapping the short pieces slightly. 


~ ~ ~


Monday, October 13, 2014

It's a Wrap! Day 13

Animal Packaging

I have eight (soon to be nine) nieces and nephews so it's always nice to have fun wrapping ideas for children. That's why this week is devoted to packages kids would like to receive. 

What child wouldn't love to get a kitty package? You could also try making another animal such as a dog, bear, rabbit, etc.

For this kitty package, you will need:
brown or tan paper (or any other color that looks cat-ish)
black sharpie
pink sharpie

1. Wrap your package in the paper of your chosen color. If you don't have wrapping paper in the right color, try using cardstock or construction paper.

2. With more paper, trace or free-hand two ears. I used a google image as a reference and experimented until I had it right. Attach the ears to the back of the package with tape or glue stick. 

3. Using the black sharpie, draw whiskers, eyes, nose, mouth, and texture on the ears. You can also draw spots or other markings on your cat if you wish. With the pink marker, color in the nose. 


~ ~ ~


Sunday, October 12, 2014

It's a Wrap! Day 12

Happy Sunday!


~ ~ ~


Saturday, October 11, 2014

It's a Wrap! Day 11

Washi Tape Banner

You only need string and washi tape for this one. It's very simple. 

1. Cut the ribbon to the length you need.
2. Cut strips of washi tape. The strips could be different lengths or all the same. Fold over with the string in between.
3. Attach the ribbon to the gift by wrapping the string around with the ends in the back and tape or tie down. 


~ ~ ~


Friday, October 10, 2014

It's a Wrap! Day 10

Balloon Attached with Washi Tape

My nephew Ben's birthday is today. He's six. Happy birthday, Benny!

For his siblings' party this past summer, Ben had a great time blowing up and playing with balloons so for his birthday package I knew I wanted to include a balloon.

On the wrapped gift, I attached a balloon with a strip of washi tape. It couldn't have been easier and looks so fun and celebratory!


~ ~ ~


Thursday, October 9, 2014

It's a Wrap! Day 9

Washi Cake

This could be used for a birthday gift, wedding gift, shower gift...

1. Cut three pieces of washi tape in varying sizes.
2. Attach to the gift with the smallest at the top and the largest at the bottom, leaving a little bit of space in between.
3. With a pen, draw a few candles on top, and draw a cake stand on the bottom. You can get as fancy or as plain as you like.


~ ~ ~